How to Add Epic Sun Beams or God Rays: 2D Compositor Blender Tutorial
It is possible to create volumetric light rays in blender using principled volumetric material and series of lamps or a sieve-like mesh obstacle to split the light into several beams. In Blender, it is also possible to create this effect in post process after rendering. This tutorial is about this second scenario. This article shows how to add the light rays to videos or images in Blender even when no light source is present in the image. Most tutorials show how to generate the beams from, for example, moon, sun, windows, etc. However, sometimes the light source is not visible in the scene, but the creator might want to add the rays coming from outside the image nevertheless. The example project used in this example is here.
Creating Light Source for the Rays
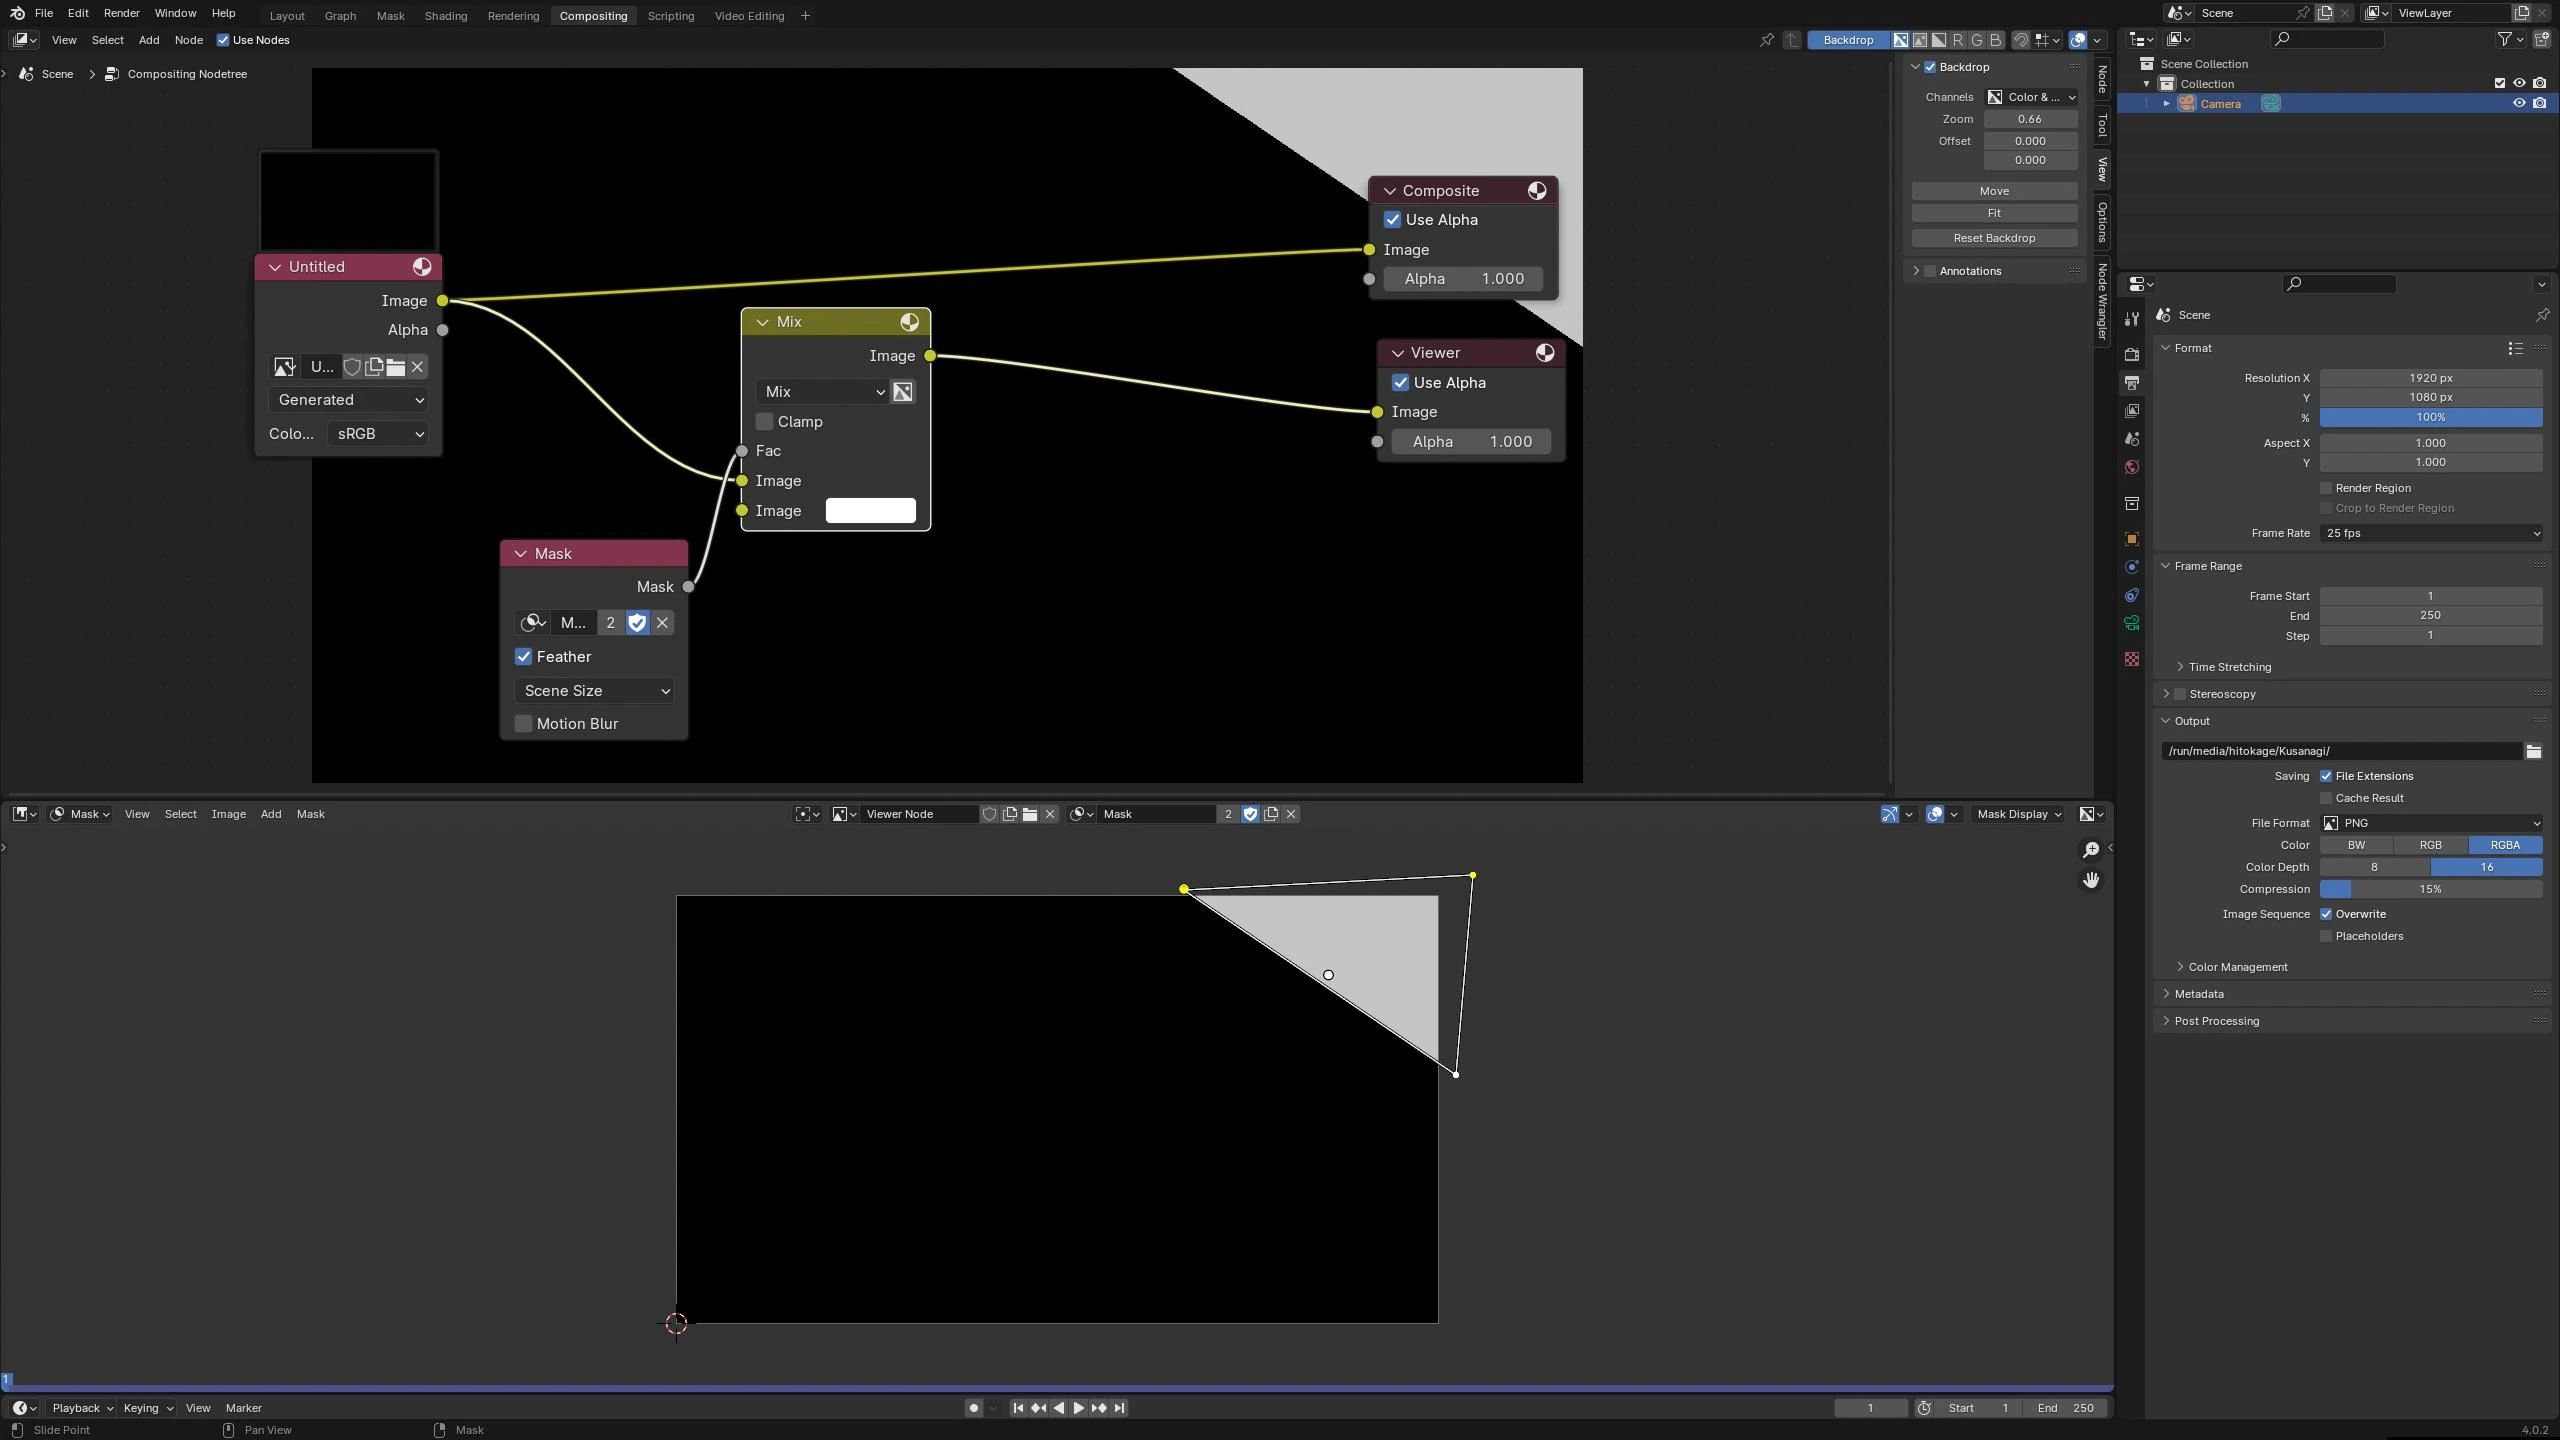
First of all let's have an input image in the Blender compositor. I have used a pure black background. When creating the rays, a source is necessary. If you have an image with sun or lamp that you want to serve as a light source, use that. In my case, I want the rays to come from outside of the image. So I have to create an artificial light source. First, I will draw a mask which will serve as the area of the light. I will place it in the right to corner.

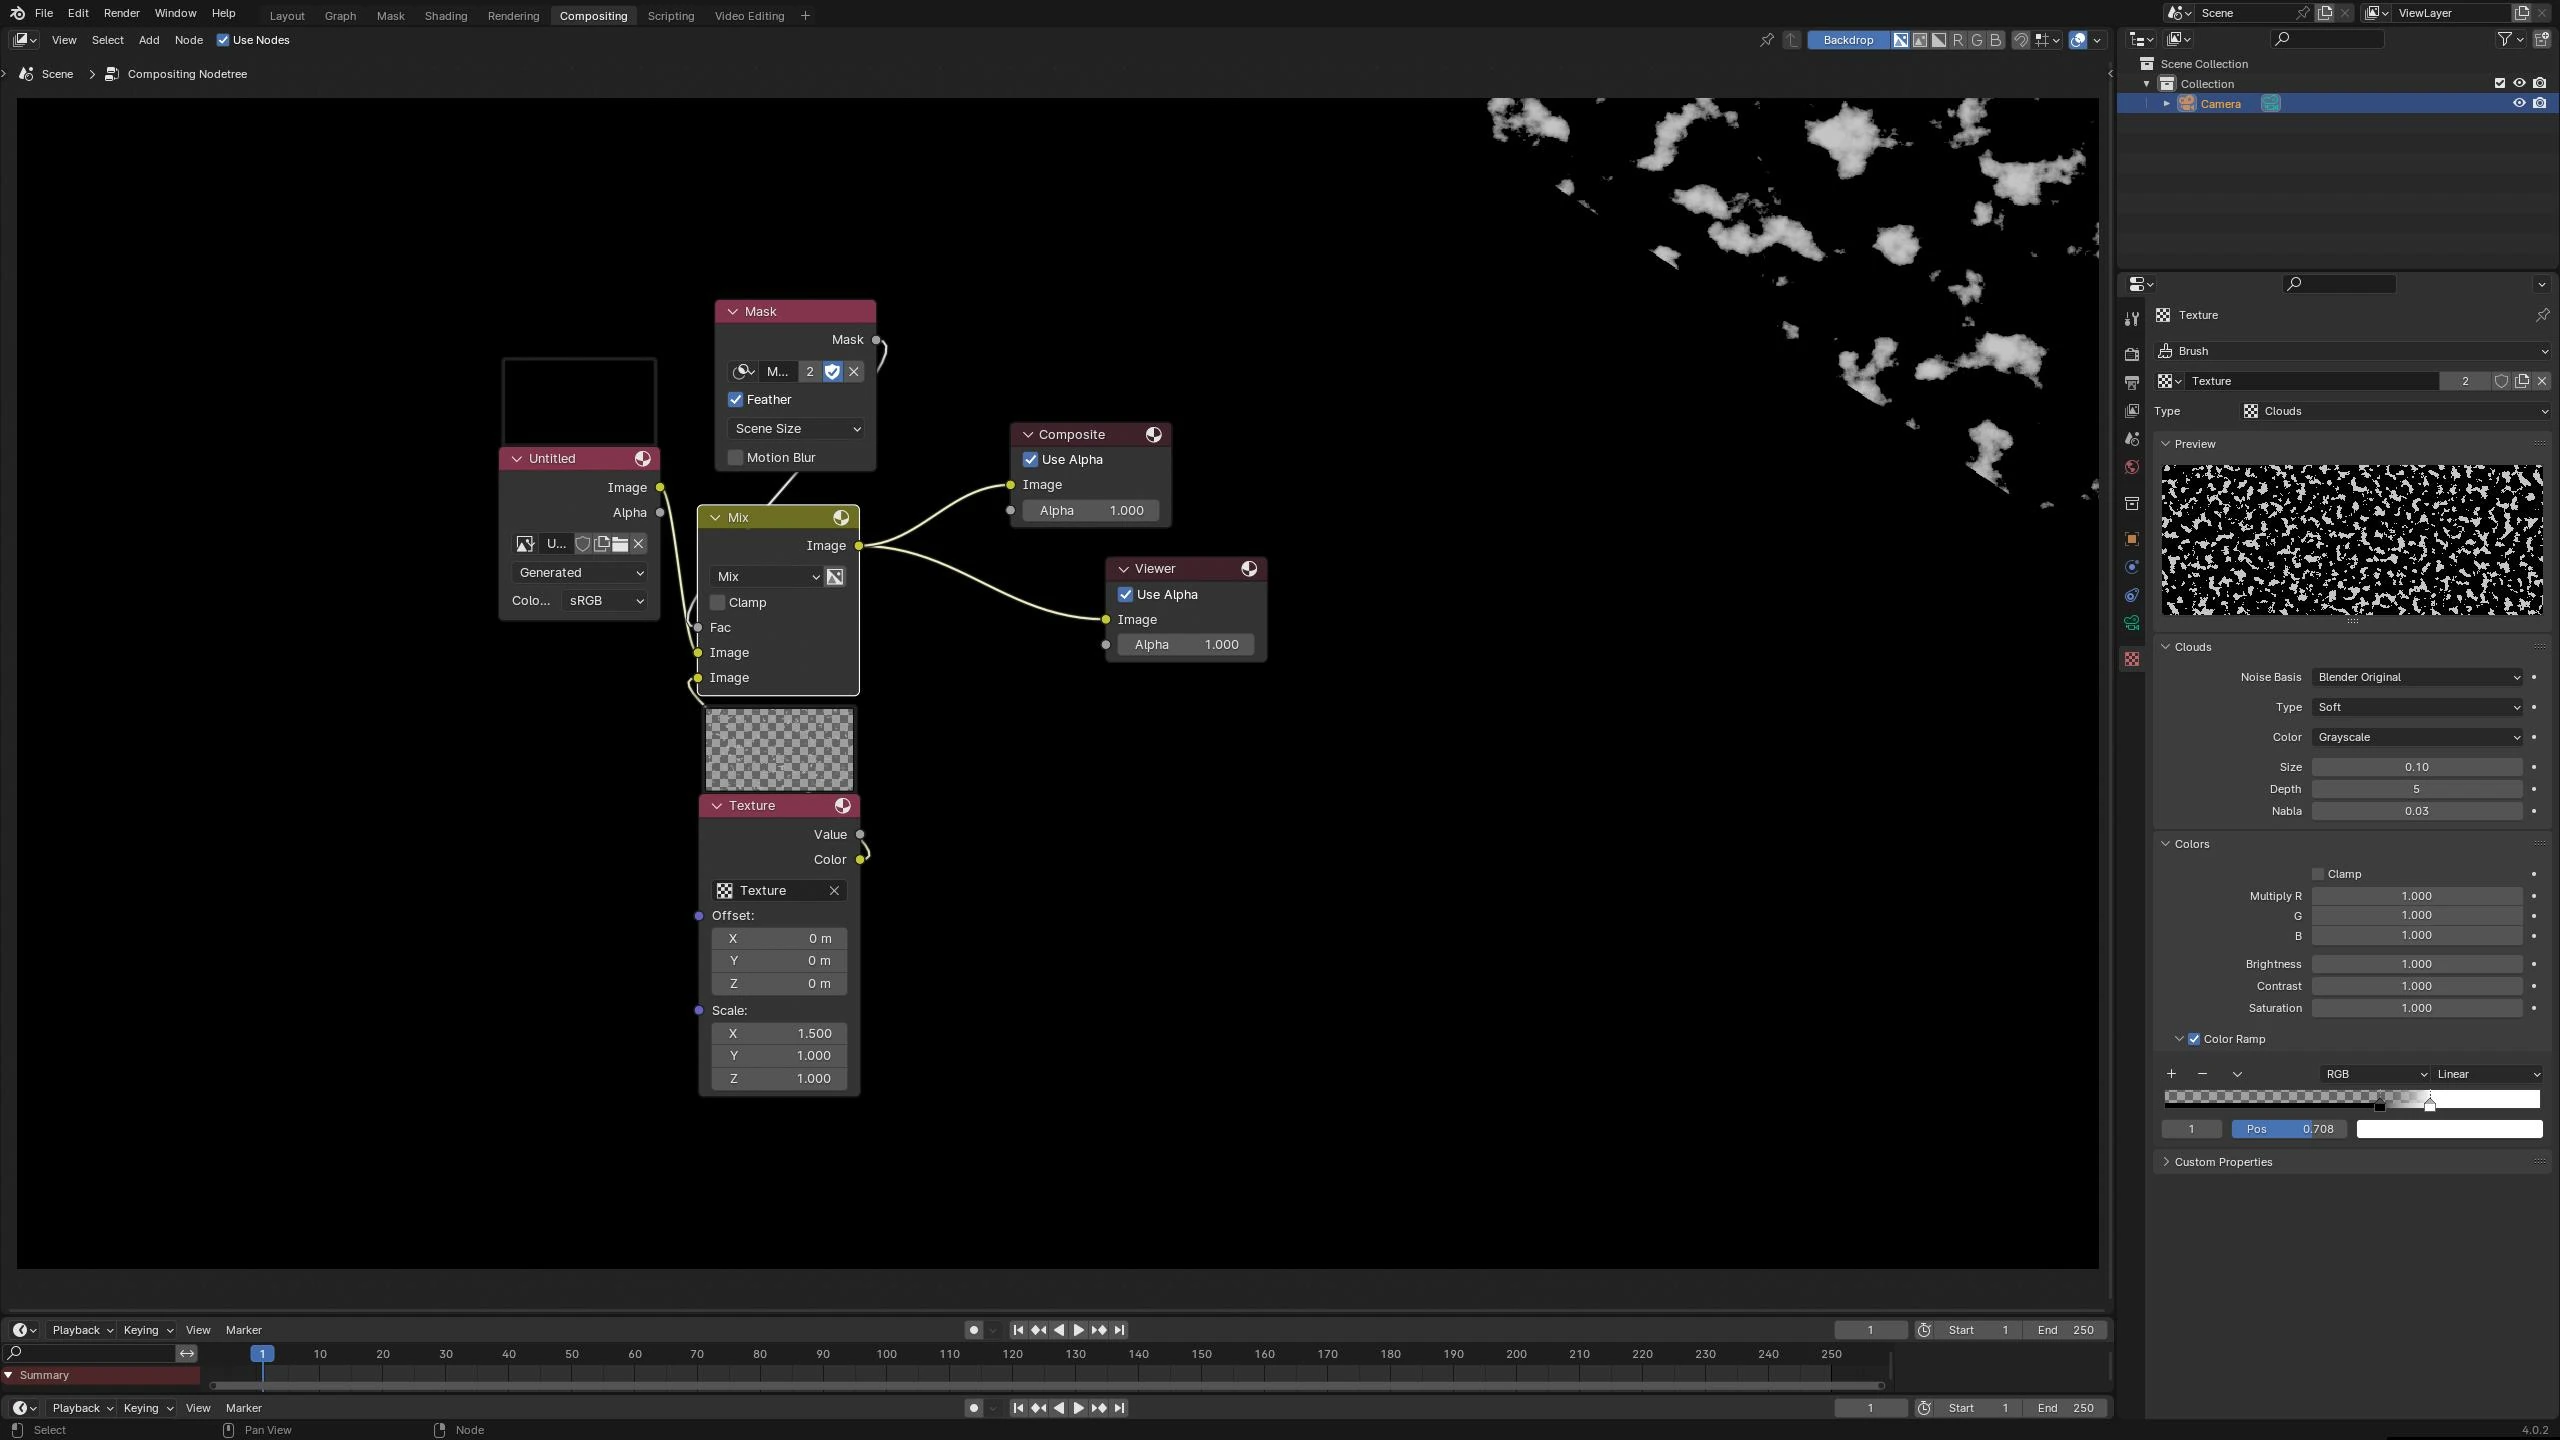
If I kept it like this, the rays would not be rays but one huge ray coming from the white area. Let's make the area more like a strainer with small areas of white color. The easiest way is to use the clouds texture to fill the masked area.

How to Add the Rays to the Scene
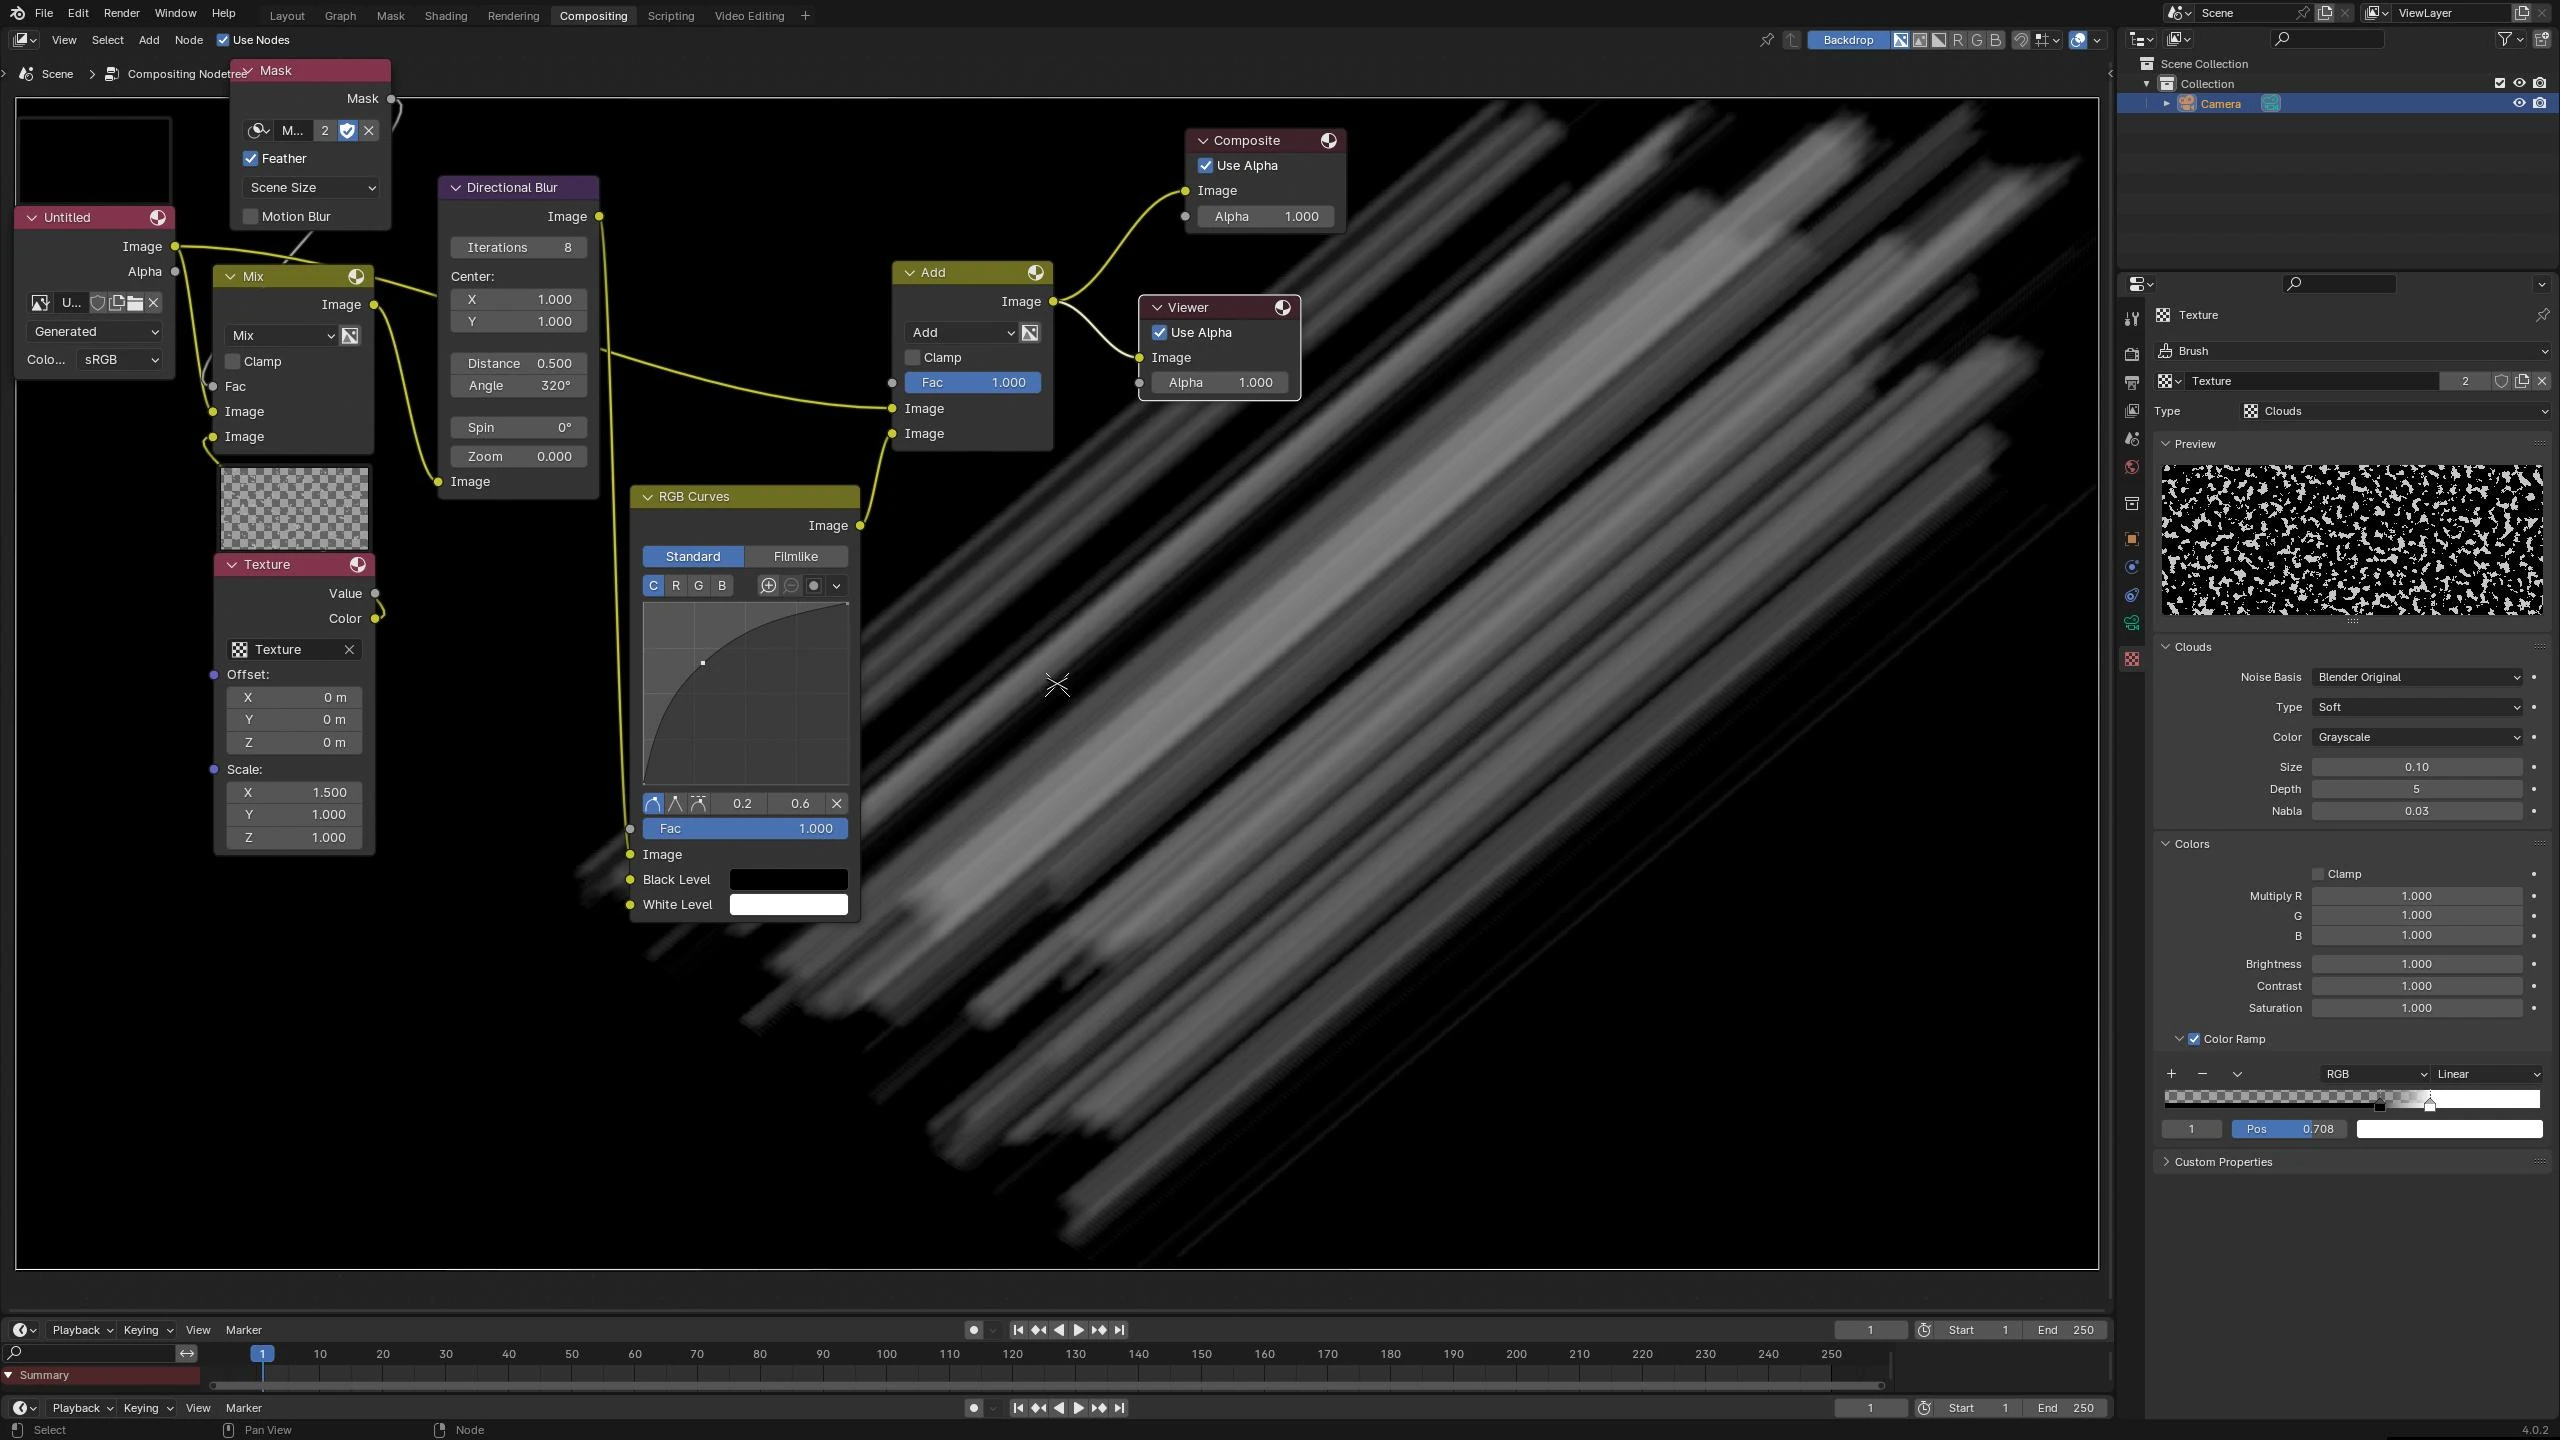
I have used two ways of adding the rays. First one is using the directional blur node. This solution is not the best one but sometimes might produce desirable results. One limitation is not being able to place the center outside the viewport when using the zoom mode. Second is that this node might take a lot of time to render when the iterations are set too high which might be necessary to reach good quality results. The node blurs the whole input image in a given direction or in a circular twisting motion or according to a specified center as if zooming. A nice feature is that these blur directions can even be combined. Therefore, I copied the input image again and added the blurred one over it to keep the black background untouched. I have also adjusted the curves of the rays image to make it more visible. In this example I have used a simple directional rays so they are parallel to each other.

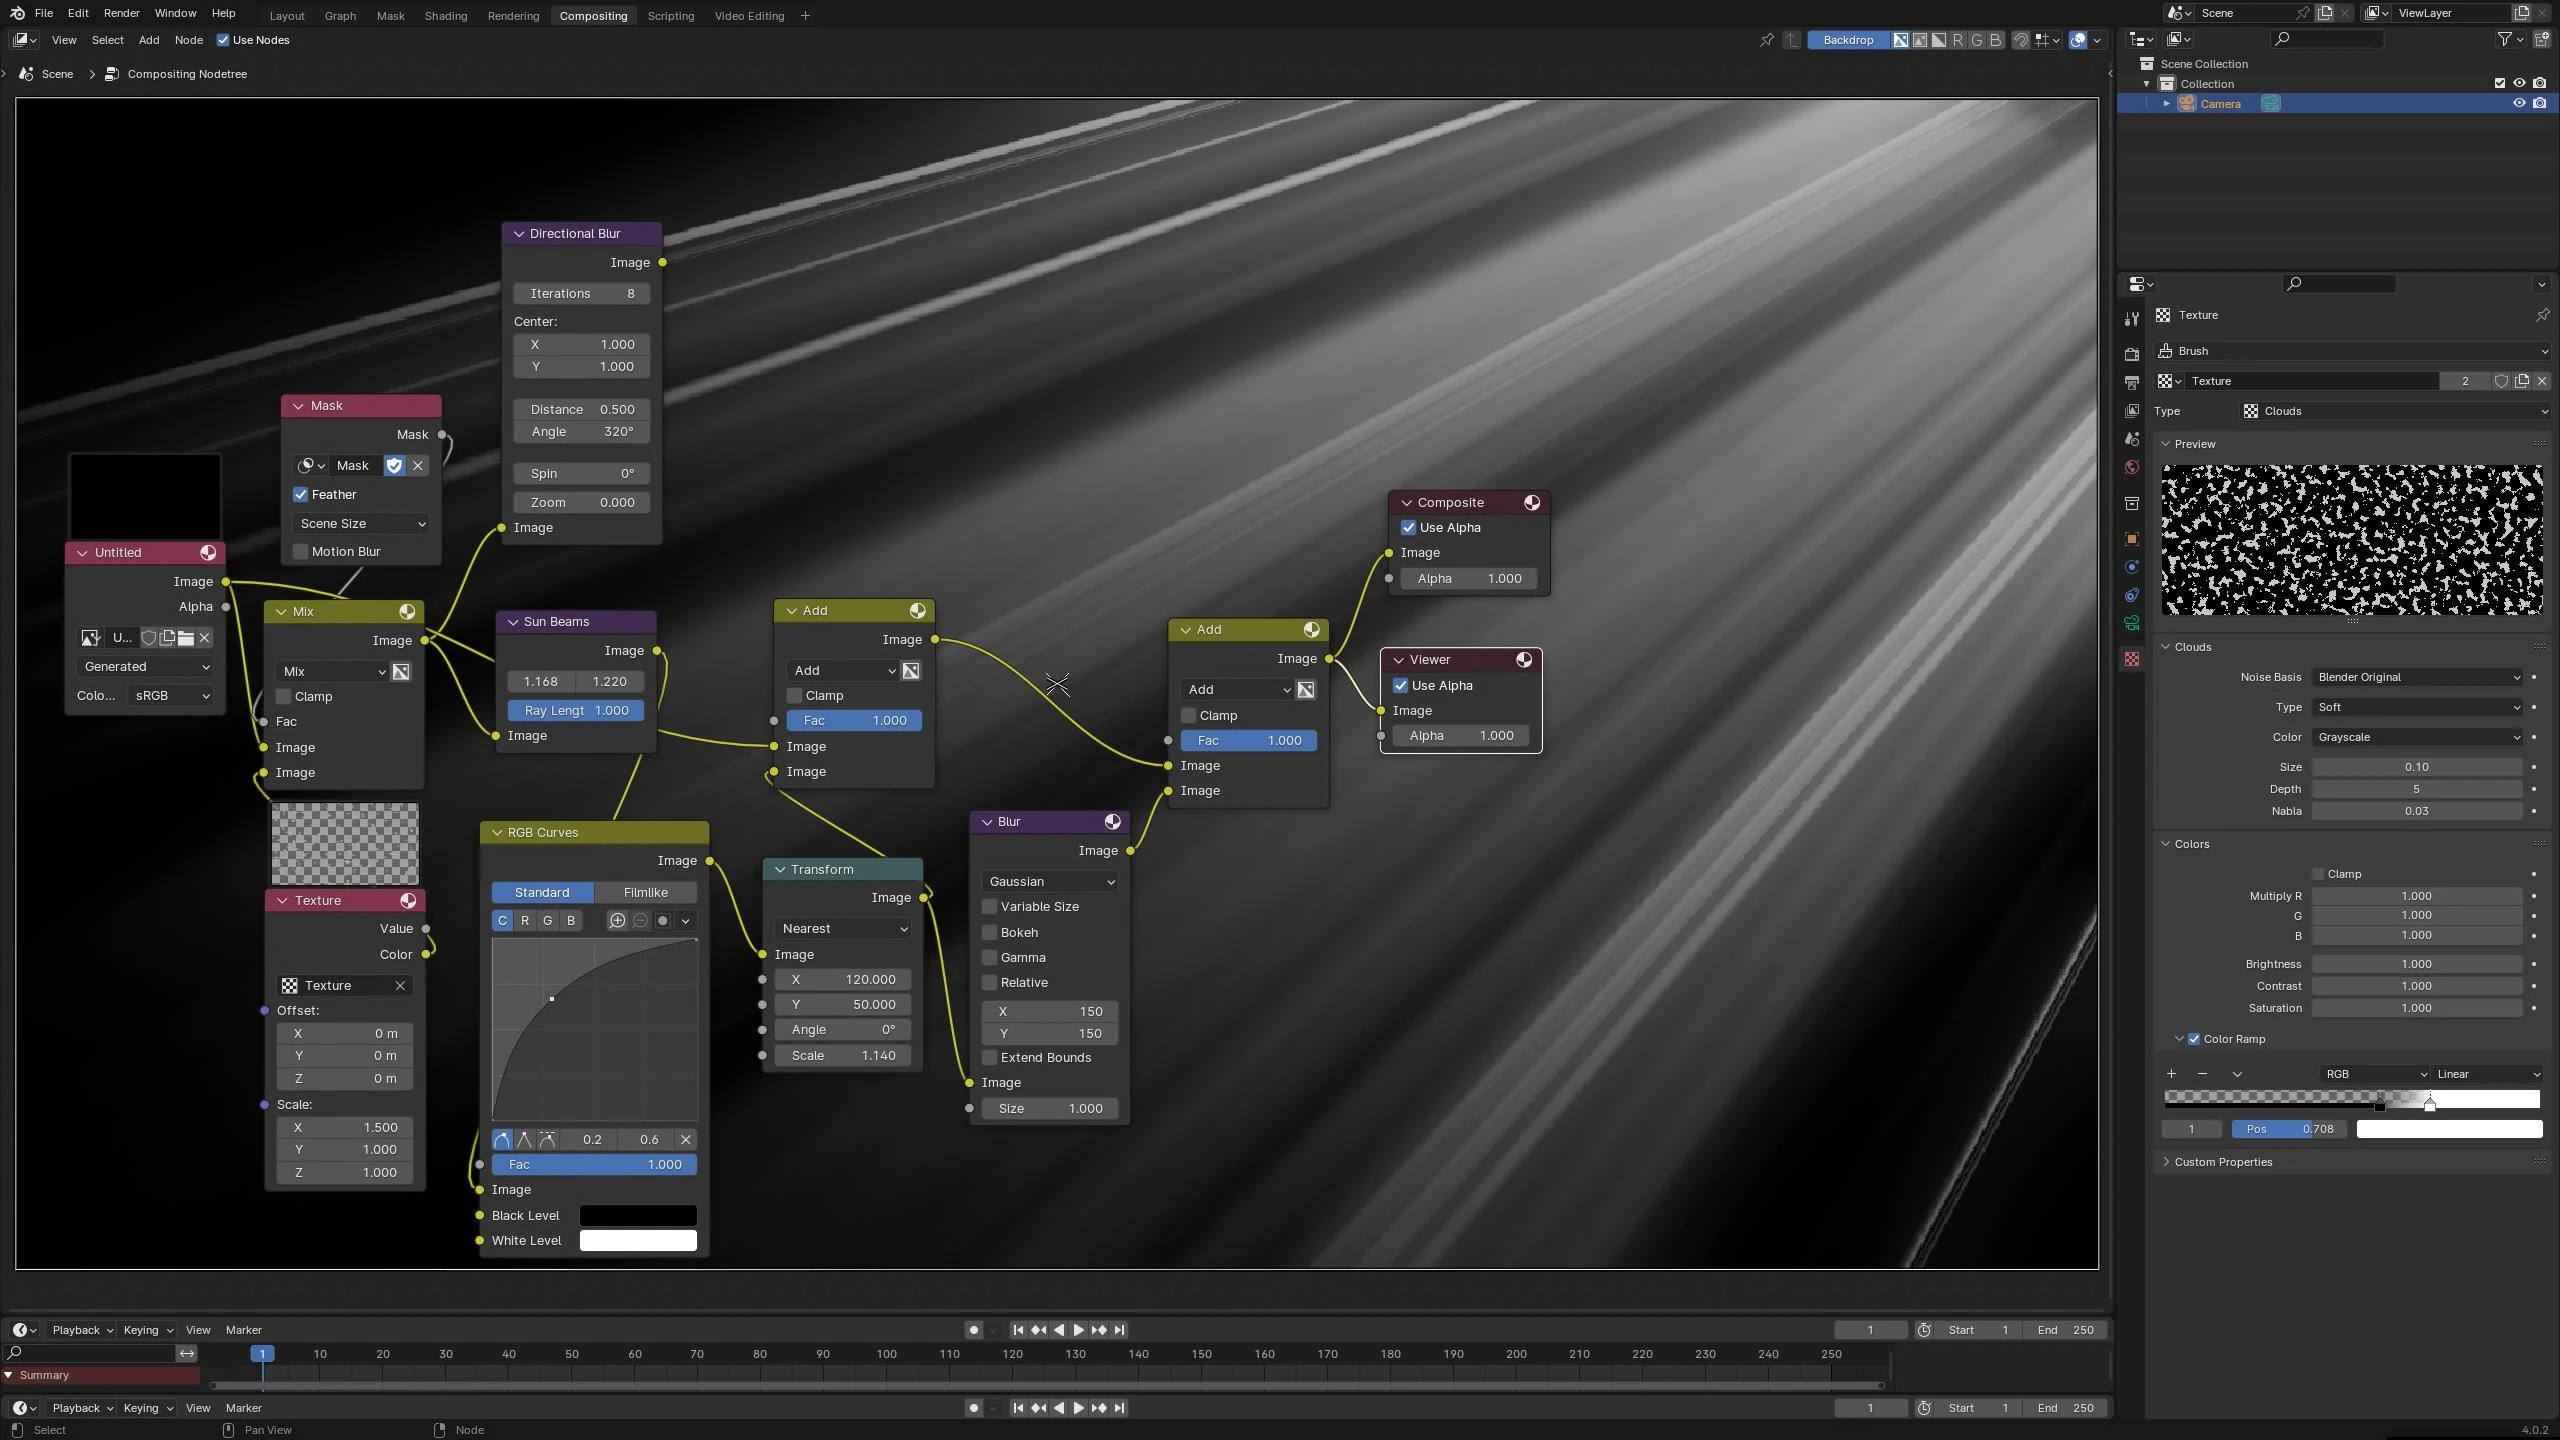
Probably a better way is to use a sun beams node which is designed for this effect. It works similarly to the directional blur when using the zooming mode and it is faster. It is necessary to set the length of the rays and to define the position of the center from which the rays are coming. In the example, I have copied the result and added blur to simulate glow in a dusty or misty environment. One final adjustment I made was the transformation of the rays image to scale them up so that they start outside of the image and not exactly at the white islands in the masked area.

I hope this explanation helps. Let me know in the comments if you have any questions or better explanation.
Published:Keywords: post processing, video edit, vfx, cgi
#tutorial #blender #blendertutorial #compositor
Privacy Terms