How to Create Real Life Sharingan and Anime Eyes Video/Photo Effect
Real Life Anime Eyes series became one of the most popular videos on my YouTube channel (my eyes are more famous then me ^^). I have covered so many of them such as Sharingan or Byakugan from Naruto, Ghoul Eye from Tokyo Ghoul, Geass from Code Geass, etc. Many people asked for a tutorial which I also made in Blender, which I use for all my VFX videos. This article is more about the general concepts behind these anime eyes effects. I wanted to make a general article which is not related to any specific software. You can use this approach in any software for video or image editing such as Adobe After Effects, Blender, Gimp, Photoshop, Sony Vegas, etc.
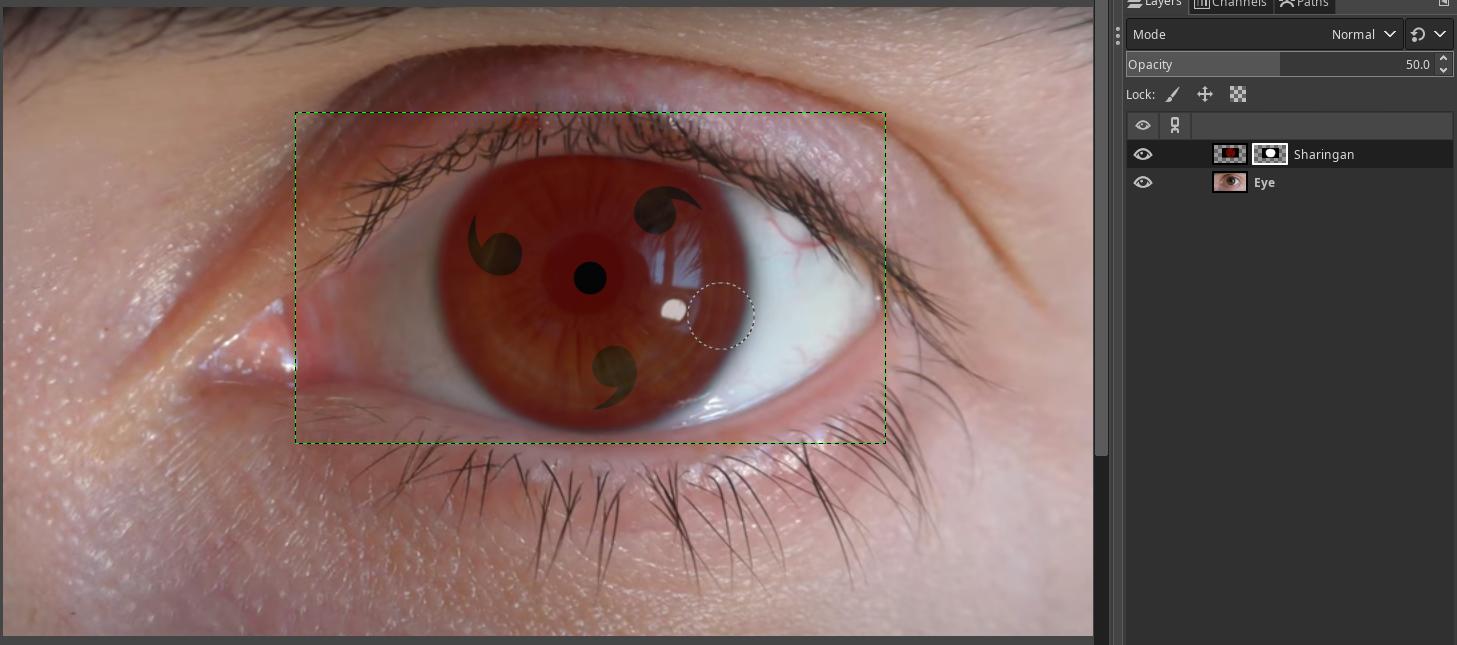
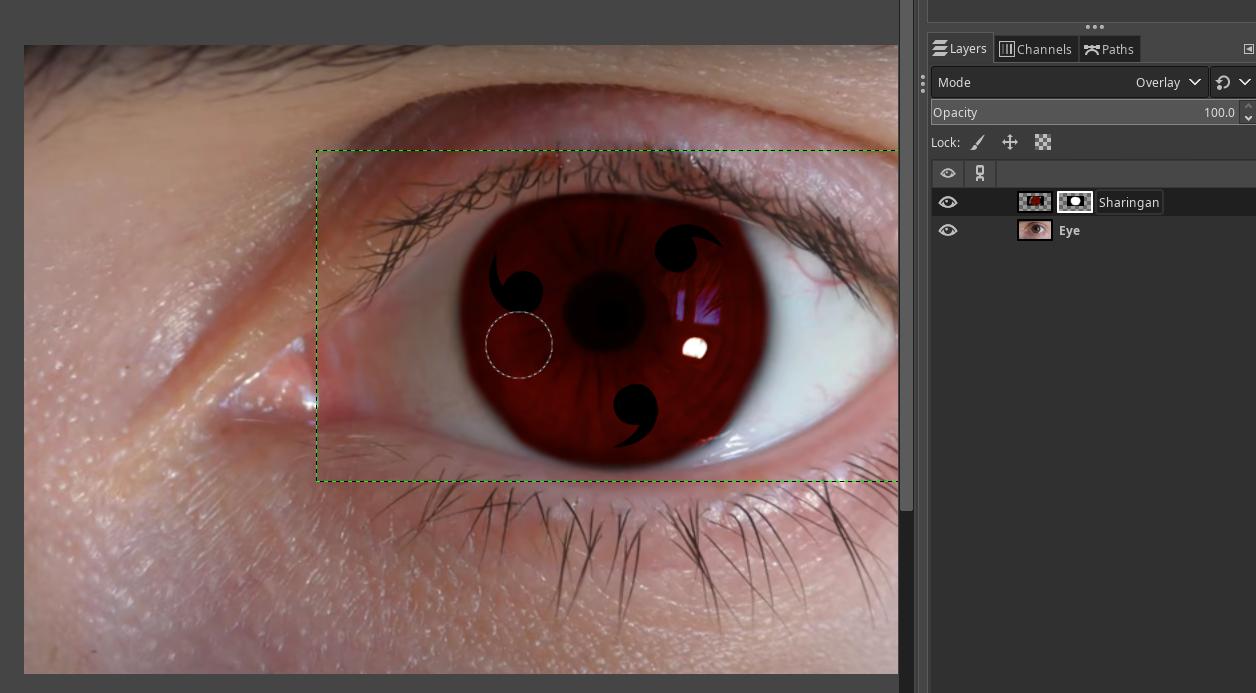
The key idea behind the effects are layers. What you basically want to do is to have your video or photo in the one layer and the effect (for example picture of sharingan or other special effect) on the top. Imagine a simple paper cutout. You have printed a photo of your eye and you cut a circle with sharingan symbol and glue it to the eye photo. That's the principle. In many software you can simply put two images on top of each other. So you would take the sharingan picture and align it exactly to the eye (scale it and move around to fit). Usually you need to clip the sharingan effect a bit to make it fit the iris exactly and not to overflow to the eyelid or other occluded parts of the iris. Or if you do not have a transparent image of the sharingan (like PNG format with so-called transparency or alpha channel), you need to cut out the background. For example, if you take a screenshot from the anime and you want to extract only the sharingan without Itachi's face, you need to cut it out. Many software provides a thing called mask. This mask defines where is the affected layer visible and where it is transparent. You would make the sharingan visible and the rest transparent.
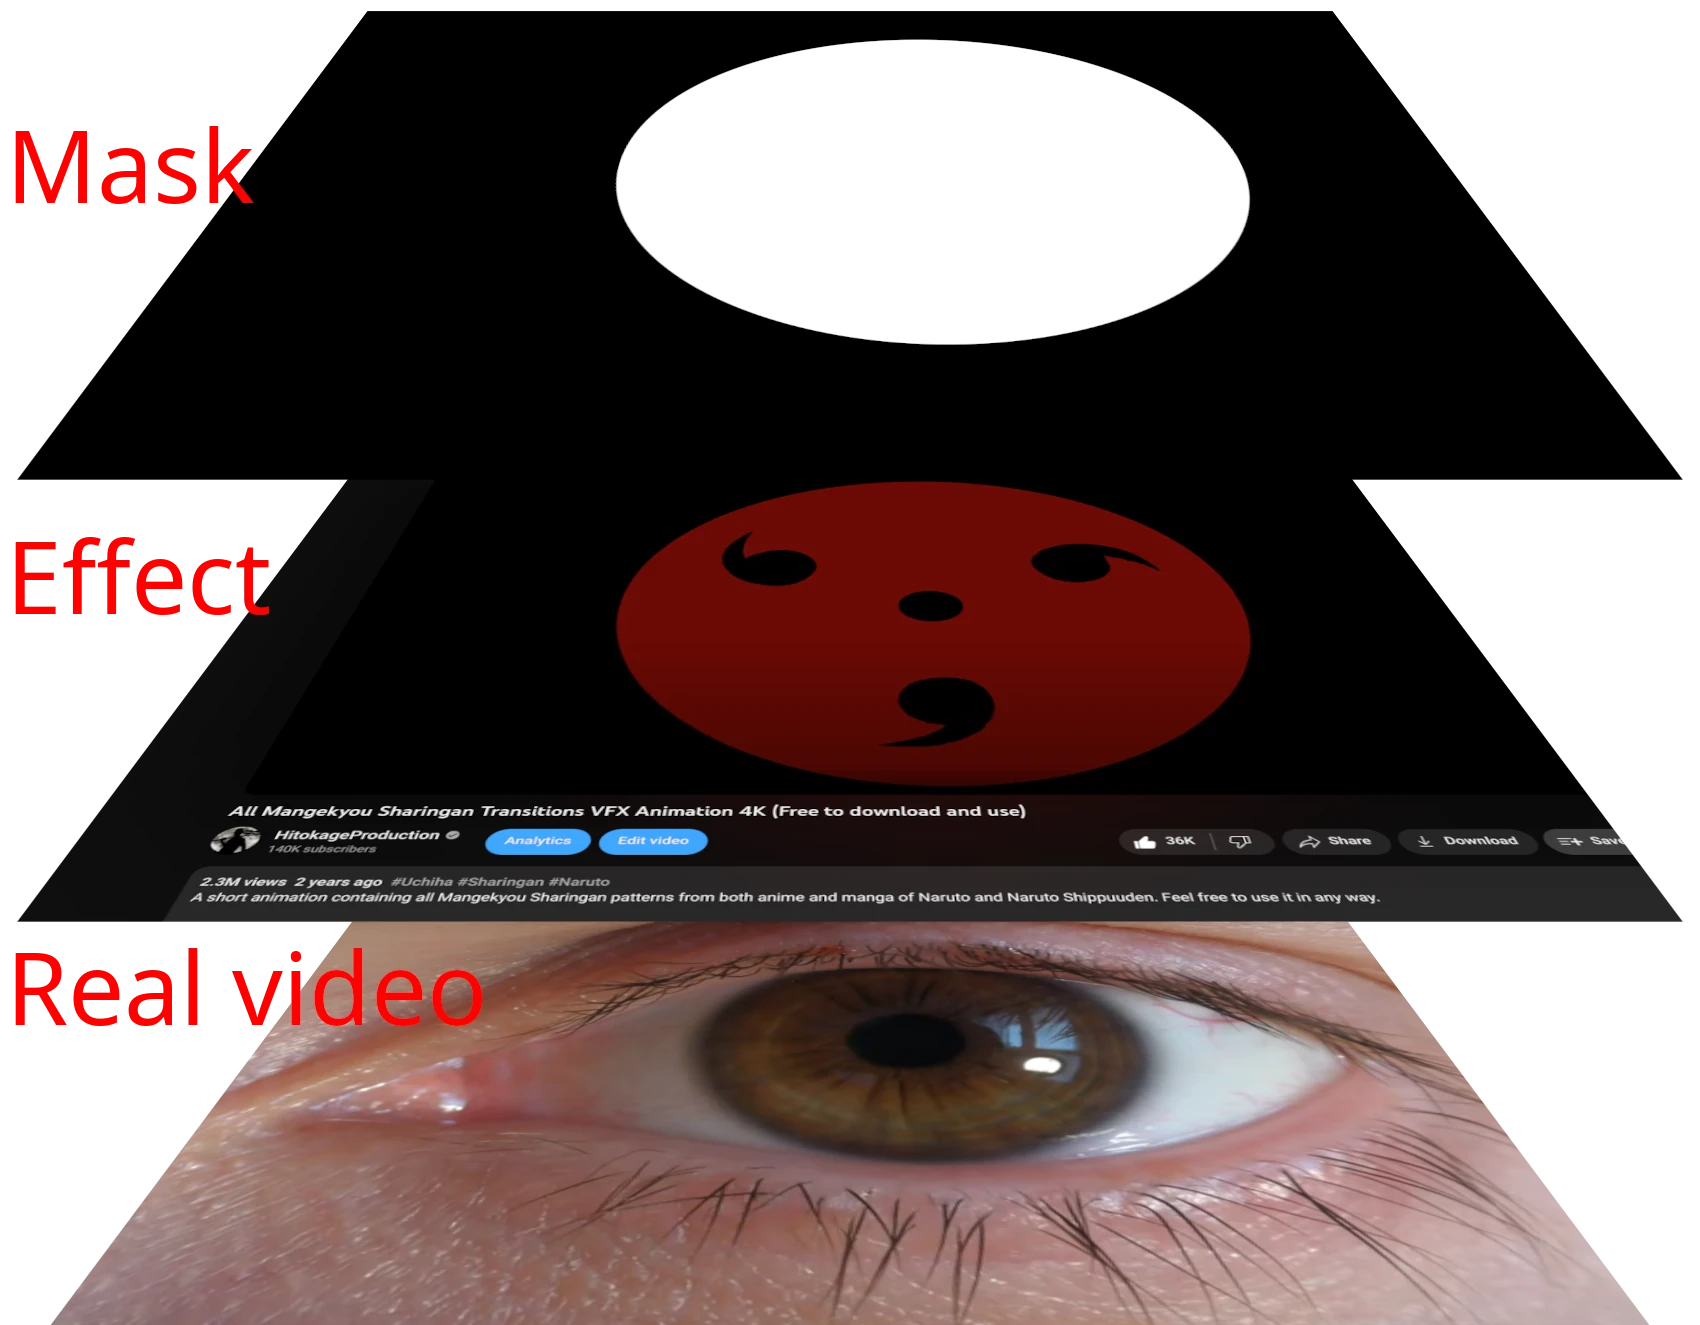
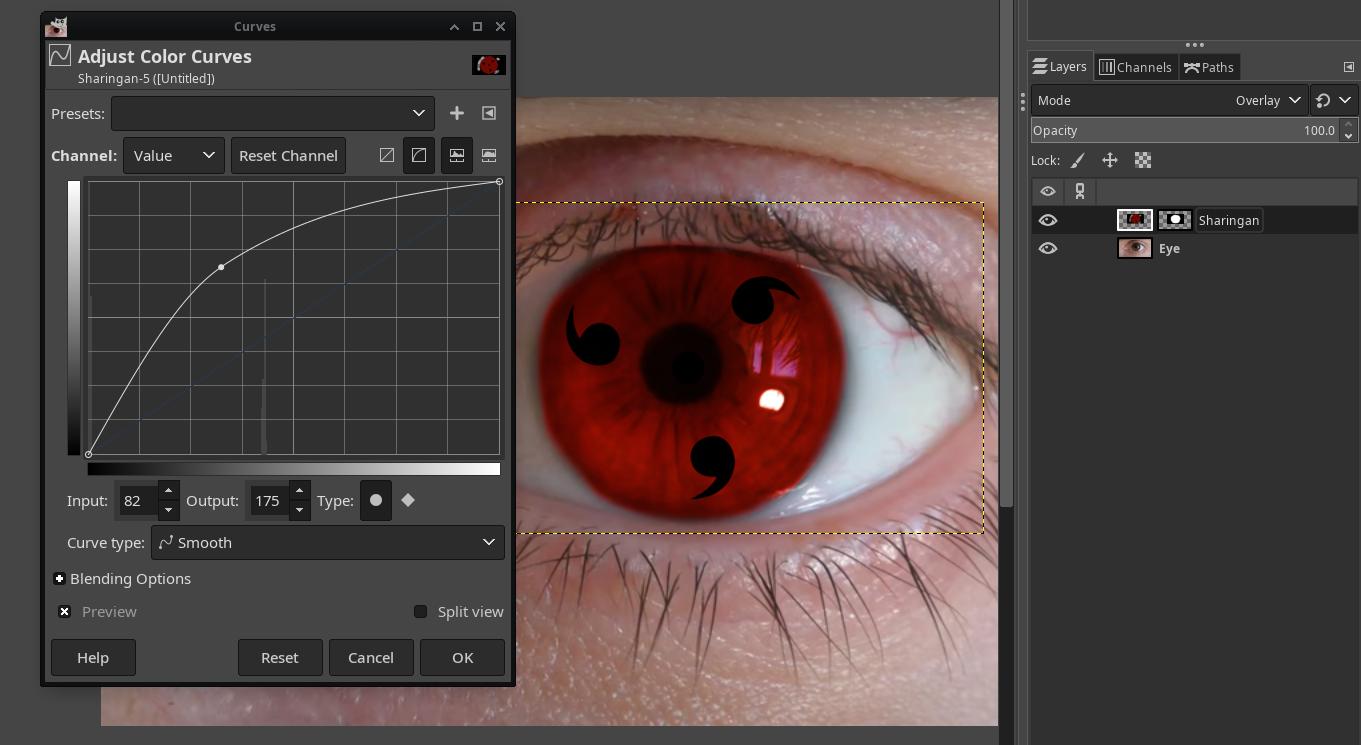
Now this would look weird. It would be too visible that the image is just placed there. The image would look too different from the eye. There are two main ways to make the effect layer fit the style of the real video layer. The first is the color adjustment. You can change the contrast and color temperature of both the effect and the real video. The second one is blending mode. Blending modes are really powerful in making effects fit well the video. The blending mode can usually be set to the given part of the layer. For example, you can change the blending mode of the sharingan image so that it blends in a different way with the video below. There is a lot of description of how these modes work in video or photo editors. Simply said, normal blending mode, sometimes called Alpha Over or something like that is the basic situation. This means that the image is simply placed over another image. Other blending modes can make the image look transparent with highlighted dark or light parts. For example, Additive blending mode highlights shiny parts of the image. If you want to add a chidori, fire, explosion, or lens flare effect to a video, you would probably choose this mode as it completely removes black background and leaves only the light colors, so it is good for any energy-like effects. If you want to add a dark smoke or some black Naruto cursed marks, you use Multiply mode which does the opposite. Sometimes Overlay mode can be useful, as it is somewhere in between these two.
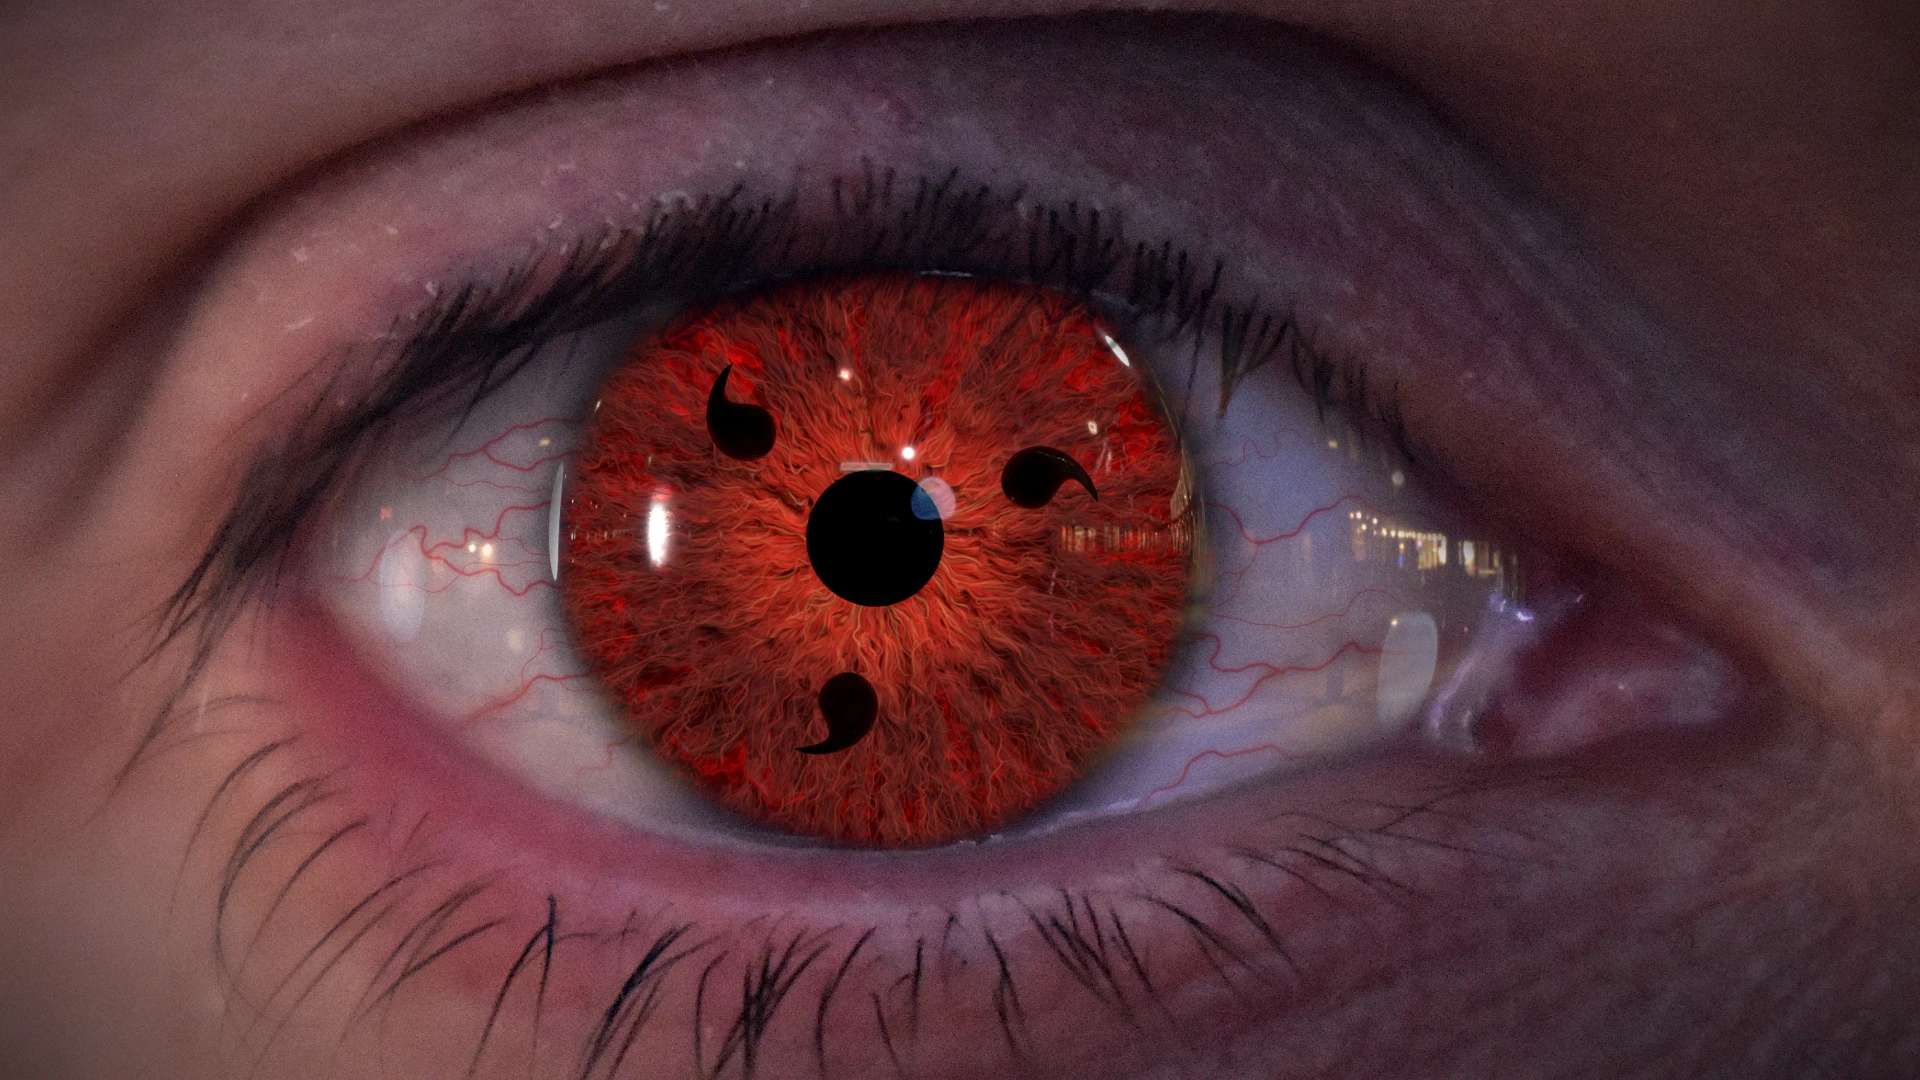
The blending mode, color editing, and setting the transparency of the effect layer are the key factors. Every footage is different, so you need to experiment with these three things to reach the best result for your use-case. After achieving a nice still composition, you need to deal with the motion in video. If your eyes move, you need to move the effect layer, too. Or you can fake it. Make a still sharingan shot and make it move like a moving camera. It will be visible but might be good enough. Every editor supports animations. You can, for example, align the layer with your eye and create the mask at the middle of the video. You open the eyes in the beginning, so you need to animate the shape of the mask so it closes with the eyelids and hides the sharingan there. Then you need to animate the position of the sharingan layer so it still follows your eye. Basically, you can set one position at the beginning, another in the middle, and the frames between these two positions will be interpolated - automatically computed. You can then add new positions (key frames) to improve the quality. You might want to look for Tracking in your software. Tracking can be sued to select a point in a video that is somehow unique (like a black dot in the middle of white background), and the software can automatically compute how the point moves in the video. If such a point is placed at your eye, it can create a trajectory of how the eye moves in the video, which you can use to animate your layer with sharingan to stay with the eye.
And here is a quick example of the principles that I mentioned. I have chosen GIMP to demonstrate the basic sharingan blending idea.
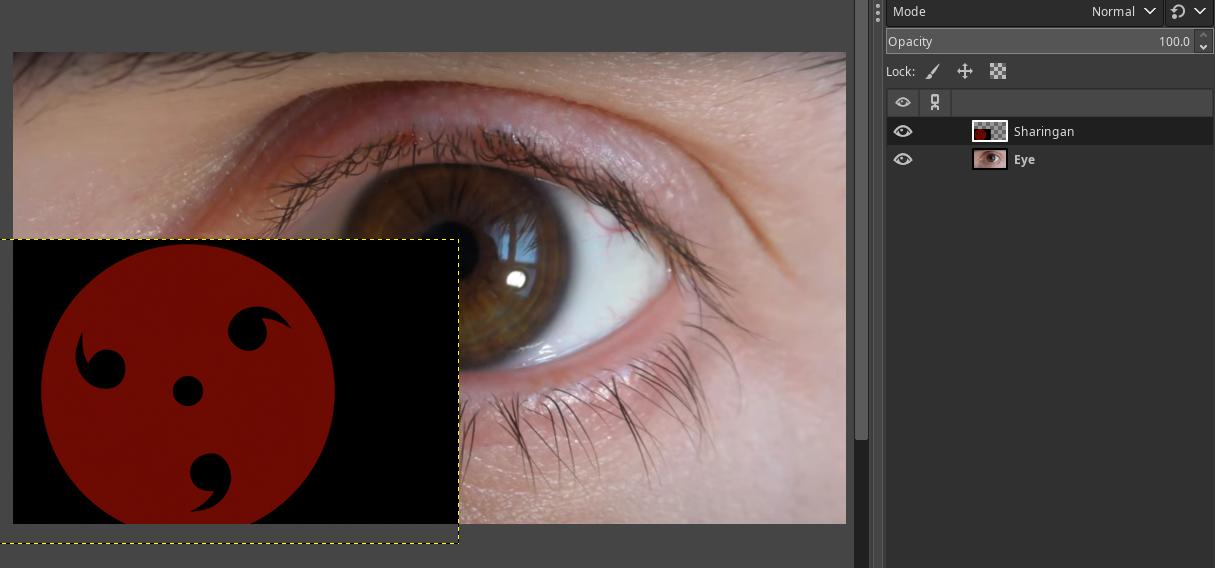
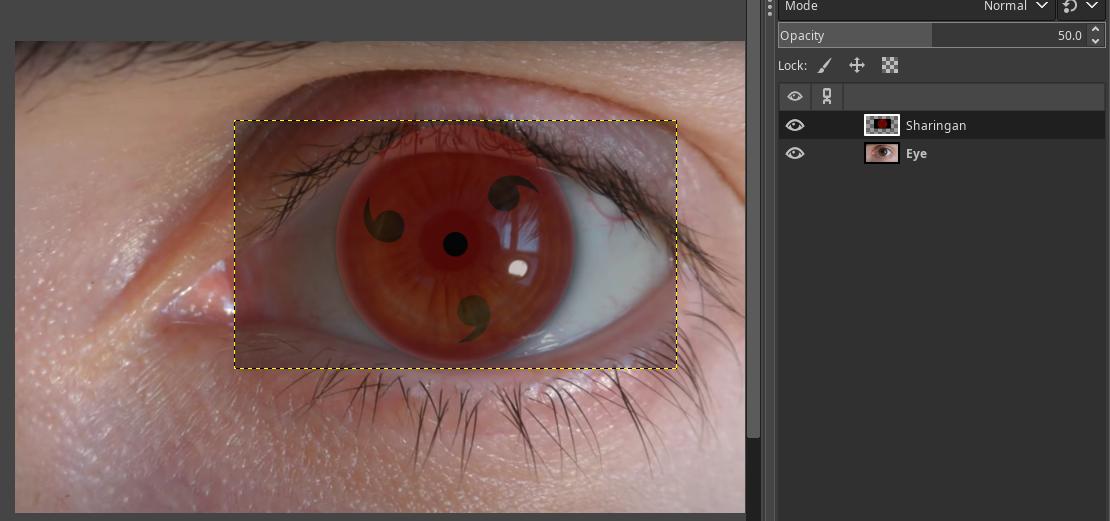
You can download the GIMP project here. I made a simple Mangekyou Sharingan animation video which you can download and use for free:
Keywords: visual effects, video editor, special effects, vfx, tutorial, simple explanation, explained
#anime #vfx #animeeyes #animetutorial #vfxtutorial #sharingan #mangekyousharingan
Privacy Terms